Have you ever ever puzzled methods to construct a multilingual utility that may effortlessly translate textual content from English to different languages? Think about creating your very personal translation device, leveraging the ability of LangChain to deal with the heavy lifting. On this article, we are going to learn to construct a primary utility utilizing LangChain to translate textual content from English to a different language. Though it’s a easy instance, it supplies a foundational understanding of some key LangChain ideas and workflows. Let’s construct an LLM Software with LCEL.

Overview
By the top of this text, we may have a greater understanding of the next factors:
- Utilizing Language Fashions: The app centres on calling a giant language mannequin (LLM) to deal with translation by sending prompts and receiving responses.
- Immediate Templates & OutputParsers: Immediate templates create versatile prompts for dynamic enter, whereas output parsers make sure the LLM’s responses are formatted accurately.
- LangChain Expression Language (LCEL): LCEL chains collectively steps like creating prompts, sending them to the LLM, and processing outputs, enabling extra complicated workflows.
- Debugging with LangSmith: LangSmith helps monitor efficiency, hint information circulation, and debug elements as your app scales.
- Deploying with LangServe: LangServe means that you can deploy your app to the cloud, making it accessible to different customers.
Step-by-Step Information for English to Japanese Translation App utilizing LangChain and LangServe
Listed here are the steps to construct an LLM Software with LCEL:
1. Set up Required Libraries
Set up the required libraries for LangChain and FastAPI:
!pip set up langchain
!pip set up -qU langchain-openai
!pip set up fastapi
!pip set up uvicorn
!pip set up langserve[all]
2. Establishing OpenAI GPT-4 Mannequin for Translation
In your Jupyter Pocket book, import the required modules and enter your OpenAI API key:
import getpass
import os
os.environ["OPENAI_API_KEY"] = getpass.getpass('Enter your OpenAI API Key:')
Subsequent, instantiate the GPT-4 mannequin for the interpretation job:
from langchain_openai import ChatOpenAI
mannequin = ChatOpenAI(mannequin="gpt-4")
3. Utilizing the Mannequin for English to Japanese Translation
We are going to now outline a system message to specify the interpretation job (English to Japanese) and a human message to enter the textual content to be translated.
from langchain_core.messages import HumanMessage, SystemMessage


messages = [
    SystemMessage(content="Translate the following from English into Japanese"),
    HumanMessage(content="I love programming in Python!"),
]

# Invoke the mannequin with the messages
response = mannequin.invoke(messages)
response.content material

4. Use Output Parsers
The output of the mannequin is greater than only a string — it contains metadata. If we need to extract simply the textual content of the interpretation, we will use an output parser:
from langchain_core.output_parsers import StrOutputParser
parser = StrOutputParser()
parsed_result = parser.invoke(response)
parsed_result
5. Chaining Elements Collectively
Now let’s chain the mannequin and the output parser collectively utilizing the | operator:
The usage of | to chain the mannequin and parser permits for a extra streamlined course of, the place the output of the mannequin is instantly processed by the parser, ensuing within the ultimate output (translated_text) being extracted instantly from the mannequin’s response. This method enhances code readability and effectivity in dealing with information transformations.
- The | operator is used to mix the mannequin and parser into single chain.
- This enables us to move the output of the mannequin instantly into the parser, making a streamlined course of the place we don’t need to manually deal with the intermediate outcomes.
- Right here, the invoke() technique is known as on the chain.
- The message variable is handed as enter to the chain. This enter is usually some information(like textual content) that we need to course of.
chain = mannequin | parser
translated_text = chain.invoke(messages)
translated_text
6. Utilizing Immediate Templates for Translation
To make the interpretation dynamic, we will create a immediate template. This manner, we will enter any English textual content for translation into Japanese.
from langchain_core.prompts import ChatPromptTemplate


system_template = "Translate the next textual content into Japanese:"
prompt_template = ChatPromptTemplate.from_messages([
    ('system', system_template),
    ('user', '{text}')
])


# Generate a structured message
outcome = prompt_template.invoke({"textual content": "I like programming in Python!"})
outcome.to_messages() 
7. Chaining with LCEL (LangChain Expression Language)
We are able to now chain the immediate template, the language mannequin, and the output parser to make the interpretation seamless:
chain = prompt_template | mannequin | parser
final_translation = chain.invoke({"textual content": "I like programming in Python!"})
final_translation

8. Debugging with LangSmith
To allow debugging and tracing with LangSmith, ensure your atmosphere variables are set accurately:
os.environ["LANGCHAIN_TRACING_V2"] = "true"
os.environ["LANGCHAIN_API_KEY"] = getpass.getpass('Enter your LangSmith API Key: ')
LangSmith will assist hint the workflow as your chain turns into extra complicated, displaying every step within the course of.
9. Deploying with LangServe
To deploy your English-to-Japanese translation app as a REST API utilizing LangServe, create a brand new Python file (e.g., serve.py or Untitled7.py):
from fastapi import FastAPI
from langchain_core.prompts import ChatPromptTemplate
from langchain_core.output_parsers import StrOutputParser
from langchain_openai import ChatOpenAI
from langserve import add_routes

import os
from langchain_openai import ChatOpenAI

# Set the OpenAI API key
os.environ["OPENAI_API_KEY"] = "Put your api right here"

# Create the mannequin occasion
mannequin = ChatOpenAI()

# Arrange the elements
system_template = "Translate the next textual content into Japanese:"Langsmithapi
prompt_template = ChatPromptTemplate.from_messages([
    ('system', system_template),
    ('user', '{text}')
])
mannequin = ChatOpenAI()
parser = StrOutputParser()

# Chain elements
chain = prompt_template | mannequin | parser

# FastAPI setup
app = FastAPI(title="LangChain English to Japanese Translation API", model="1.0")
add_routes(app, chain, path="/chain")

if __name__ == "__main__":
    import uvicorn
    uvicorn.run(app, host="localhost", port=8000)
10. Operating the Server
To run the server, execute the next command within the terminal:
python Untitled7.py
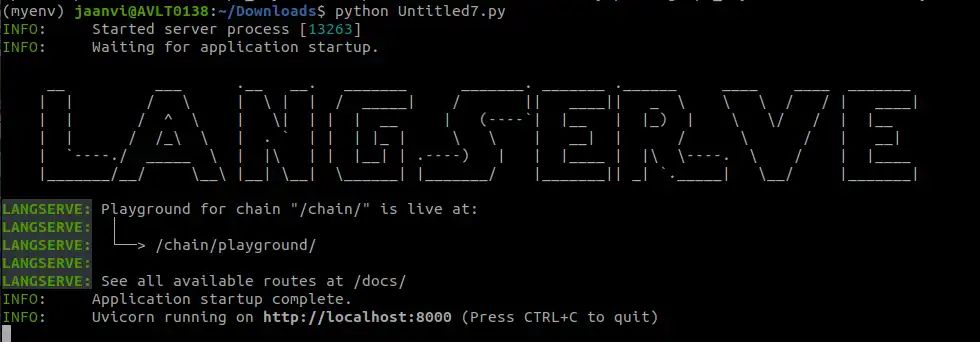
Your translation app will now be operating at http://localhost:8000. You may take a look at the API utilizing the /chain/playground endpoint to work together with the interpretation API.
11. Interacting Programmatically with the API
You may work together with the API utilizing LangServe’s RemoteRunnable:
from langserve import RemoteRunnable

remote_chain = RemoteRunnable("http://localhost:8000/chain/")
translated_text = remote_chain.invoke({"textual content": "I like programming in Python!"})
print(translated_text) 
Conclusion
On this tutorial, we constructed an English-to-Japanese translation app utilizing LangChain (LLM Software with LCEL). We created a versatile and scalable translation API by chaining elements like immediate templates, language fashions, and output parsers. Now you can modify it to translate into different languages or develop its performance to incorporate language detection or extra complicated workflows.
If you’re on the lookout for a Generative AI course on-line, then discover: GenAI Pinnacle Program
Regularly Requested Questions
Ans. LangChain is a framework that simplifies the method of working with language fashions (LLMs) by chaining numerous elements akin to immediate templates, language fashions, and output parsers. On this app, LangChain is used to construct a translation workflow, from inputting textual content to translating it into one other language.
Ans. The SystemMessage defines the duty for the language mannequin (e.g., “Translate the next from English into Japanese”), whereas the HumanMessage comprises the precise textual content you need to translate.
Ans. A Immediate Template means that you can dynamically create a structured immediate for the LLM by defining placeholders (e.g., textual content to be translated) within the template. This makes the interpretation course of versatile, as you may enter completely different texts and reuse the identical construction.
Ans. LCEL allows you to seamlessly chain elements. On this app, elements such because the immediate template, the language mannequin, and the output parser are chained utilizing the | operator. This simplifies the workflow by connecting completely different steps within the translation course of.
Ans. LangSmith is a device for debugging and tracing your LangChain workflows. As your app turns into extra complicated, LangSmith helps monitor every step and supplies insights into efficiency and information circulation, aiding in troubleshooting and optimization.